FREE Painting Tutorial!

3-PART VIDEO TUTORIAL on YouTube
Want to learn some fun painting tips and tricks? Come join me! I'm sharing in-depth information about the process I used to create a painting of flowers in a vase with acrylics and collage. Grab your paint brushes and let's make something lovely :) In addition to the video tutorial, below you'll find a materials list, reference image, process photos and written instructions.
Please contact me if any questions come up as you go, and Happy Creating!
____________________________________________________________
MATERIALS
- 8X8 inch unprimed wood panel
- Acrylic paints – Titanium white, and here are the colors I premixed:
- Light Blue
- Deep / Royal Blue
- Dark Brown
- Brick Red
- Peach
- Mustard Yellow
- High Flow Medium for Acrylics - I used Golden brand
- Colour Shaper tool - I used a #6 Taper Point (see phase 1 photo, right)
- A range of small to medium sized acrylic paint brushes
- including a fine point brush for detail
- Matte Medium
- Both used as a clear coat to seal the wood and as a "glue" for the collage pieces
- A couple small pieces of paper for collage
- Consider old cook books, instruction manuals, advertisements, etc.
- Consider old cook books, instruction manuals, advertisements, etc.
- Palette knife or small spatula for mixing paint
- Acrylic Paint Pens - I used Posca Pens
- Fine tip (white) & bullet shaped (fluorescent yellow)
____________________________________________________________
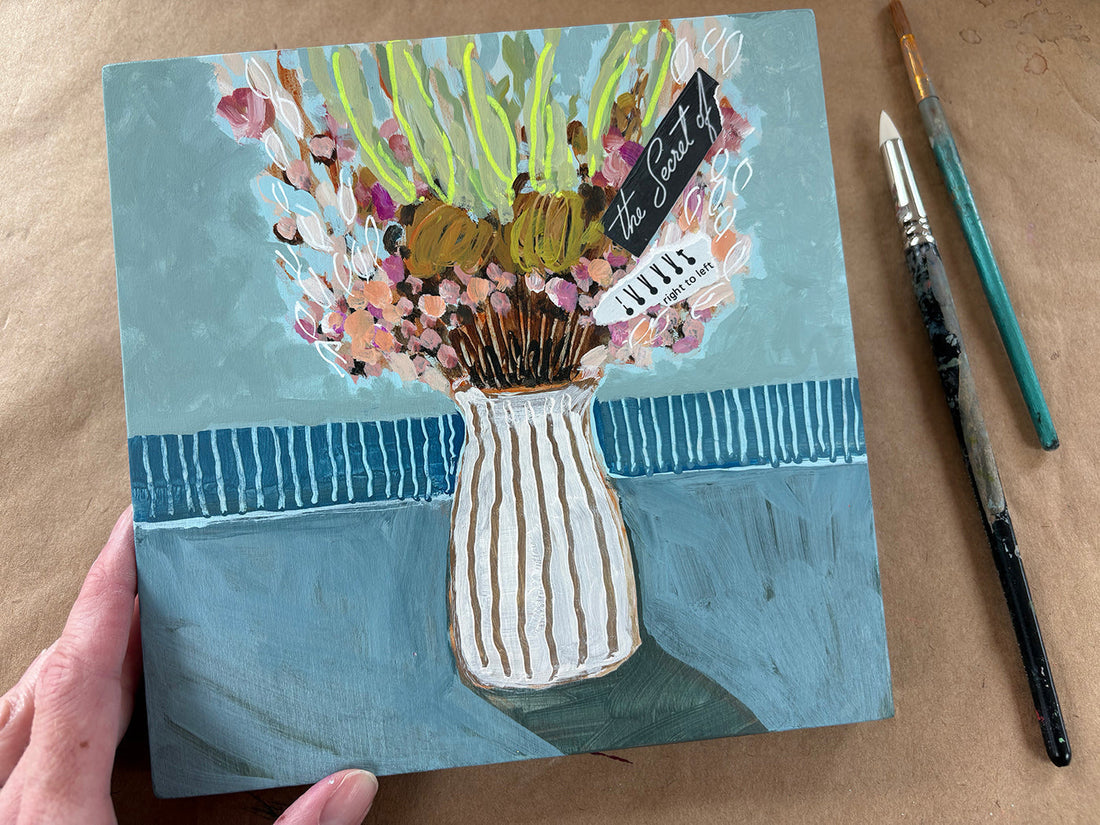
REFERENCE PHOTO

Typically, I paint from photos I've taken for reference. Feel free to print this photo or view it digitally as you paint. These dried flowers are from my sweet friend Faith, and placed in one of my favorite, stripy vases (thanks, Vicky!).
____________________________________________________________
PHASE 1: Base Layer & Paint Sketch

- Prime wood panel with a clear coat of matte medium.
- Apply one continuous coat of background color. I used a really light blue, mixed with a bit of high flow medium.
- Create a sketch using a paint brush and brick red, mixed with high flow.
- Edit or "erase" the sketch by painting over it with the background blue color.
____________________________________________________________
PHASE 2: Foreground & Vase Shadow

- Apply a darker blue/green/gray layer in the foreground, carefully painting around the edges of the vase. This will become the shadow.
- Add some white to the blue/green/gray color previously used to lighten it up. Paint over the dark layer with the lighter color, carefully painting around the vase and around the vase shadow. Remember to carry colors around the panel edges as you go.
- Experiment with a color to use on the vase. I changed my vase color several times throughout this painting! So no need to worry about this yet.
____________________________________________________________
PHASE 3: Paint Dark Tones

- Using a mix of dark brown, brick red, and a touch of deep blue, paint some dark areas to help provide contrast – this will help the brighter colors we add in later to pop!
- When painting over the stem area, use a colour shaper to scrape away the dark brown, leaving lighter lines for the stems.
____________________________________________________________
PHASE 4: Add Color to Flowers & Leaves

- Add color to the flowers and leaves using loose dabs and strokes of paint.
- Experiment with the colour shaper to remove paint in some areas (I used this technique on the mustard yellow flowers!).
____________________________________________________________
PHASE 5: Add Breathing Room & Band of Pattern

- Create a band of pattern in the middle
- Use a deep blue and a wide, flat brush to paint the band across, carefully painting around the top of the vase.
- Work quickly so you can scrape away lines using the colour shaper before the paint dries.
- Use the background light blue color to add breathing room back into the flowers and to clean up around the edges.
- Decide where your collage pieces will go. Apply a coat of matte medium to act as the glue, pressing down on the paper to remove any air bubbles.
- Apply a coat of matte medium over the top of your collage elements to act as a seal/varnish.
____________________________________________________________
PHASE 6: Finishing Touches

- You've made it to the final phase! These are all the fun details that bring the painting to completion.
- Use acrylic paint pens to trace around some of the leaves or flowers. Experiment with line thickness and have fun!
- Starting with the background blue, mix a new, slightly darker blue. Fill in the background around the flowers, leaving room for some of the lighter blue to show through. This adds texture and helps the flowers stand out.
- Fill in the vase area with a warm gray. Once dry, paint over the gray with white. Use the colour shaper to scrape away lines while the paint is still wet (creating a gray line pattern). Nice contrast, right?!
____________________________________________________________
Thank you so much for painting along with me! Ready for more? Check out the painting classes I offer through Kara Bullock Art School! Click HERE for more info.